Surfaces are created with the default pattern specified for surfaces using the Tool Defaults option of the Edit menu. The default surface pattern is none, but this can be changed for individual by using the options available in the surface area info panel.
To Add/Change Surface Pattern:
| 1. | Select the surface using the selection tool. The surface area info panel will be displayed. |
| 2. | There are two squares displayed to the right of the surface area info panel. The square on the left displays the current surface color. The square on the right displays the current surface pattern. |
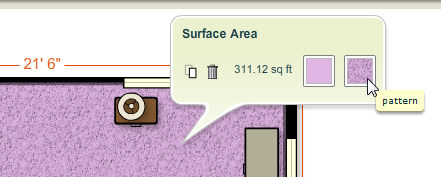
| 3. | Click on the square on the right to pick a new pattern for the surface. A palette will be displayed with the available patterns. Select the new pattern for the surface by clicking on it. |
| • | The scale field displays the current scaling. Enter a new scale value in the field or click on the up and down arrows  to the right of the scale field to scale the pattern according to your preferences. The pattern will be scaled to reflect the changes you made. to the right of the scale field to scale the pattern according to your preferences. The pattern will be scaled to reflect the changes you made. |
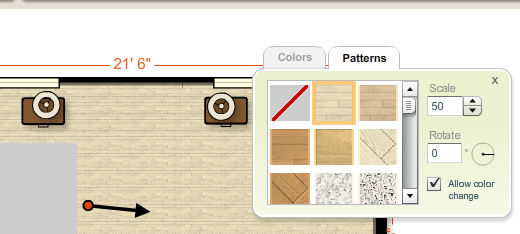
| • | You can rotate a pattern by manipulating the rotate controls. Enter the angle at which the pattern should be rotated in the Rotate field or click and drag the line in the  icon to rotate the pattern. icon to rotate the pattern. |
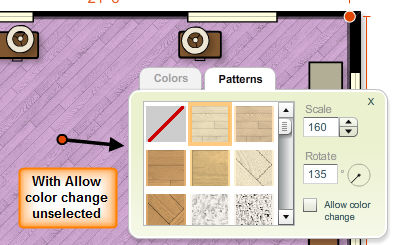
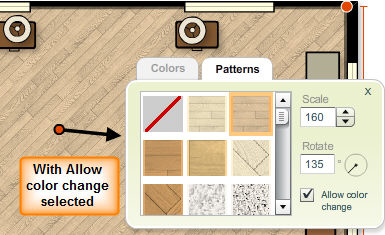
| • | The allow color change option controls whether the color associated with a pattern can change as you select new patterns. When Allow Color Change is checked, the color will update using the color of each new pattern you select. When unchecked, new patterns that are selected will appear using the color assigned to the surface when the Allow Color Change was unchecked. |
| 4. | Once you find a pattern you like, click on the  button in the top right corner of the color palette to close it. button in the top right corner of the color palette to close it. |
| 5. | The surface will now display the new pattern. |


