|
<< Click to Display Table of Contents >> Save a Plan |
  
|
|
<< Click to Display Table of Contents >> Save a Plan |
|
Icovia allows you to save your plans so you can retrieve them later. Saving plans is also a great way to create variations of your room designs and it’s always a good idea to save your work frequently. To save a plan, you must first register with Icovia and login.
Icovia handles saved files differently than desktop applications, saving them in an online database rather than as visible files on your computer. This means you can access your saved plans from any computer with Internet access.
Note: plans also need to be saved before they can be shared.
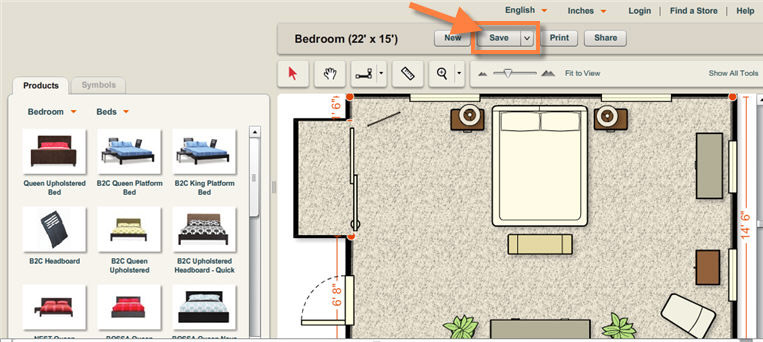
| 1. | Click on the Save button from the top panel above the workspace. |
| • | If you’re saving a new plan, you’ll be prompted to choose a name for your plan and select the type of room from a pull down list. Click the Save button at the bottom of this window once you’ve named your plan. Click Cancel to cancel the Save command and return to the workspace. |
| • | If you’re saving changes to a plan that you’ve already saved, you will not be prompted to enter a plan name. Selecting Save in this instance will save over the last saved version of your plan. |
| 2. | To Save a copy of your current plan select Save As from the pull down list by clicking the down arrow on the right side of the Save button. |
| • | You’ll be prompted to choose a name for your plan and select the type of room from a pull down list. Click the Save button at the bottom of this window once you’ve named your plan. Click Cancel to cancel the Save command and return to the workspace. |
| 3. | You can also access the Save commands from by clicking Show All Tools and selecting the File menu at the top of the Icovia window. |