In a 2020 Icovia planner optioned with a company's Product Catalog, a Products tab appears next to the Symbols tab on the left side of your screen. The Products tab allows you to browse through the company's actual products and add them to your plans. You can select the category of products using the category selection menus available just below the products tab.
Products can be added to your plans and manipulated much like symbols, but there are some differences worth noting. Like generic symbols, products that have been placed in your plan can be moved, rotated, deleted, duplicated and locked. You can also apply a color of your choice to products, although this color will exist for your reference only and will not accurately reflect the product you may purchase.
But unlike generic symbols, products represent actual furniture and other household items and these items have an actual size that cannot be changed. As a result, products cannot be resized. The product name is also fixed and cannot be changed.
When you click on a product in your plan, the product info panel will display the actual product specifications. This info panel also includes link to detailed product information. When you print your plan, a list of products and detailed product information also appears for any products you’ve added to your plans.
To add products to your plan:
| 1. | Select the Products tab on the left side of the screen. |
| 2. | Use the category selection menus located just below the Products tab to browse through the catalog of products. |
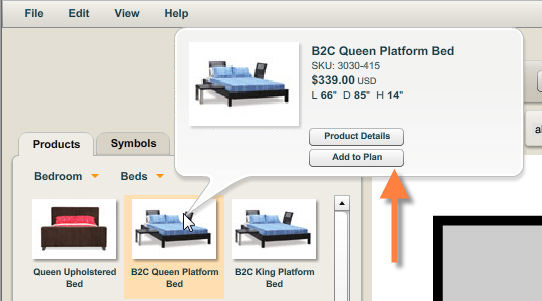
| 3. | You can learn more about products by moving your cursor over the small product images that appear in the Products tab. |
| • | The product info panel will appear with details like the product name, item number and product dimensions. |
| • | This panel also includes buttons for viewing Product Details and adding the product to your plan. In some cases, there are additional buttons for Add to Cart and Request Info. |
| 4. | When you find the product you’re looking for, simply click and drag it into your plan. |
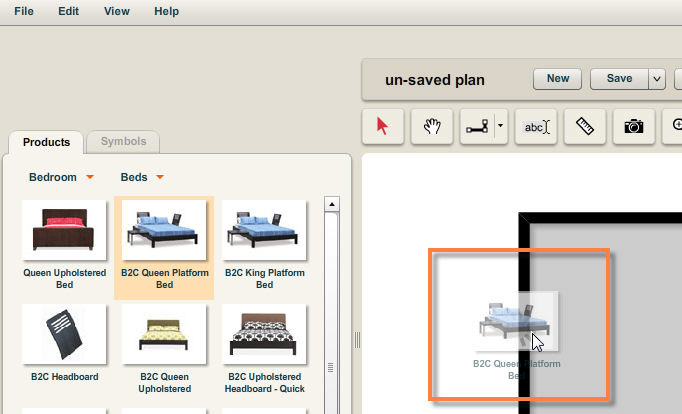
| 5. | The product will appear in your plan as a two dimensional illustration of the product, much like the way symbols are represented. Products appearing in your plan will have a tinted color to help you differentiate between generic symbols, which appear white by default, and products. |
| 6. | Click on the product in your plan to view the product info panel. |
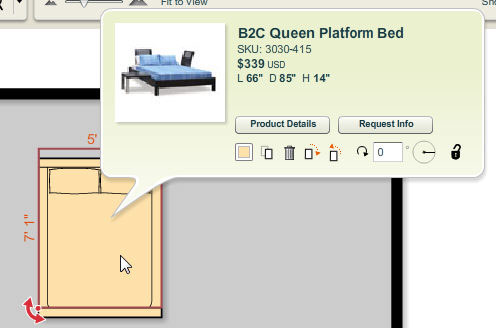
| 7. | While products cannot be resized, they can be rotated, duplicated, locked and deleted just like symbols. The color in which the product is displayed on the plan can be also changed. |


