|
<< Click to Display Table of Contents >> Wall Tool |
  
|
|
<< Click to Display Table of Contents >> Wall Tool |
|
The wall tool allows you to add walls to your floor plans. The wall tool is available in the tools palette at the top of the screen, represented by an icon of three connected points.
Note: The wall tool is an advanced design feature and is revealed by clicking the Show All Tools link in the top right corner of the screen.
| 1. | Click on the |

| 2. | A drop-down list of the options available under the wall tool menu is displayed. |
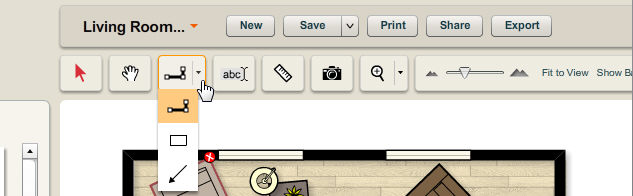
| 3. | Select the wall tool by clicking on it. Once the wall tool is selected, it will be displayed in the tools palette till you select the surface tool or the line tool again. |
| 4. | Now simply Click and Drag to create a rectangle or 4 sided room. |
| 5. | To create a more complex shape click and release where you want the first point, and then move your mouse. A banding line follows your cursor indicating the wall orientation. By clicking multiple times you can create as many wall points as you want. Press the Escape key to end or click on your starting point. |
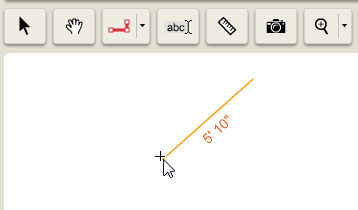
6. Select the end point for the wall. The wall will appear in your floor plan once you release the mouse button.
7. In the middle of the banding line is a text box that gives you dynamic feedback of the length. Walls will snap to an angle in 45° increments. You can override this behavior by turning of the Snap Walls 90° command.
8. Once the wall is drawn, you can drag any point to any distance or angle.