|
<< Click to Display Table of Contents >> Adding Structural Items |
  
|
|
<< Click to Display Table of Contents >> Adding Structural Items |
|
When you first create your plan, start by adding structural items like doors, windows, stairs and wall openings. This ensures that furniture you add to your room will fit within the constraints of these fixed structural items.
Symbols for doors, windows, stairs and openings are found in the Structural Symbols category of the Symbols tab and can be added to your plan by clicking and dragging them onto the workspace. Certain structural symbols like windows and doors will snap to walls when you drag them onto a wall.
| 1. | Click on the Symbols tab on the left side of the screen. |
| 2. | Click on the |
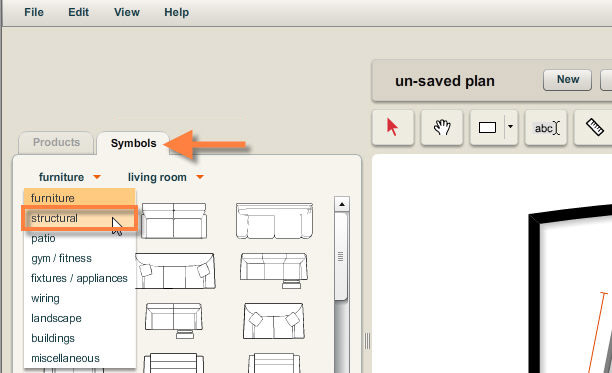
| 3. | The drop-down list on the right will update to reflect the categories within the structural symbols. Click on the |

| 4. | The symbol library for the selected category will be displayed below. |
| 5. | To add a structural symbol to your plan, click and drag it onto the workspace. |