Icovia allows you to create professional quality printouts of your designs complete with color and detailed lists of the products and symbols that appear in your plans. It’s a great way to share your designs with others. Bring copies of your printed plans with you when you’re shopping in retail stores – it will help you and the store sales and design staff select furniture that fits your home.
You can print your plan using the Print button in the Plan Control bar or by selecting Print in the File menu. Printing Icovia plans is the same as printing any other document. Any printer that is accessible to your computer can be used.
To Print a Plan:
| 1. | Click on the Print button in the Plan Control Bar. |

| • | You can also select Print from the File Menu. |

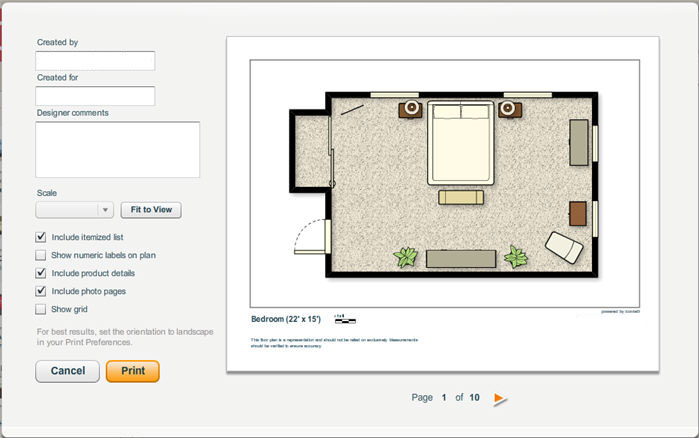
| 2. | The Print Preview window appears to display how the printed plan will look. Printing options are displayed on the left side of the window. Controls for navigating to next and previous pages are available below the preview image. |
Note: The following settings are optional. You can either change these options or leave them at their default settings according to your preferences.
| • | Created by field – Enter your name if you would like it to appear on your printed plans. This is an optional step and you can leave this field blank. If you’re logged in when you use the Print feature, your email address will be displayed in this field by default. |
| • | Created for field – Enter the name of the person or company for whom the plan was created and it will appear on your printed plans. This is an optional step and you can leave this field blank. |
| • | Designer Comments field – Enter any comments you want to appear on the printed plan. This is an optional step and you can leave this field blank. |
| • | Scale field – Click on the to view the available list of scale values and select one. To return to the default view where your plan is fit to the page, click the Fit to View button. |
| • | Include itemized list checkbox – When checked, an itemized list of all the products and symbols placed on your plan will appear on a separate page. |
| • | Show numeric labels on plan checkbox – When checked, numeric labels will appear on the products and symbols in your floor plan. These labels correspond to the itemized list if that option has been selected. |
| • | Include product details checkbox – When checked, a separate product details page will appear for each unique product that appears in your floor plan. This option is only available in planners that have products appearing in the products tab. |
| • | Include photo pages checkbox – When checked, any photos that have been placed in your plan will be printed in a separate section when you print your plans. |
| • | Show Grid checkbox – When checked, to the grid will appear in your printed plan. |
| 3. | Click the Print button. |
Note: You can click on the Cancel button to exit the Print Preview window and return to the main workspace.
| 4. | The Print dialog box handled by your computer’s operating system will be displayed. In this Print dialog box (this will differ depending on your operating system), change print orientation to Landscape. |
| 5. | Select the printer you want to use. |
| 6. | Click the Print Button. |


